
Short tutorial about Git
Written by Marianella Fernanda Quezada Macchiavello and Danilo Eduardo Cursi
- Getting Started
- Initializing a Git Repository
- Recording changes to the repository
- Handling files
- GitHub
- BitBucket
- Git Commands
Git is a free and open source distributed version control system (VCS). A version control is a system that records changes to a file or set of files over time so that you can recall specific versions later (Chancon & Straub, 2014). A VCS allows to revert files or entire projects back to a previous state, to compare changes over time, and to see who last modified something (who and when an issue was introduced).
There are a lot of materials available on the internet about how to handle with Git. This tutorial is only an introduction with basic concepts to help you to work with Git.
Getting Started
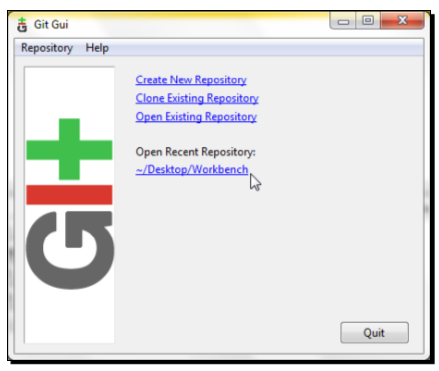
Git can be downloaded from the internet, it is free and can be installed in different operational systems (Windows, Mac Os and Linux). For those who are more familiar to graphical interface, Git provides the graphical user interface mode (GUI). It is also available the command-line interface mode (CLI). The image below illustrates the GUI mode, however, in this tutorial all the examples will be focused on the CLI mode.
Installing Git in Linux
To install Git, open a terminal and run the following commands with superuser permissions:
sudo apt-get install git
To know the current version:
git --version
Configure Git in Linux
Before starting to use Git, it is necessary to configure it. To do it,
use the command git config and then set the user name and the e-mail
address, as following below:
git config --global user.name "Name  LastName"

# git config --global user.name "marianella-quezada"

git config --global user.email name@example.com

# git config --global user.email marianellaquezada@gmail.com
It is possible to configure the text editor that Git will use (if not configured, Git uses the system default editor). The following command is to use the Emacs as our text editor:
git config --global core.editor emacs
To check the settings:
git config --list
Getting Help
There are diferent ways to have Git help. For example, if you have any doubt about how to use a specific command, you can do the following:
git help <verb>
git <verb> --help
man git <verb>
Example:
git help config
Also, there are more information available on the internet: Official homepage, Git wiki
Initializing a Git Repository
It is possible to initiate a Git project using three main approaches:
To create a new (empty) repository, go to the directory and run:
mkdir project      #creates a directory
cd project         #goes to the directory
git init           #initializes the repository
If you have some initial content, run:
cd  folder_name
git init
git add .          # . to include everything
git commit -m "Creating a new repository"
or you can get a copy of a Git existing repository in GitHub (further).
Recording changes to the repository
To record changes in the repository three steps are needed:
-
Making some changes to the working directory
-
Telling Git about your changes (tracking our files)
-
Confirm changes in Git using the commit command
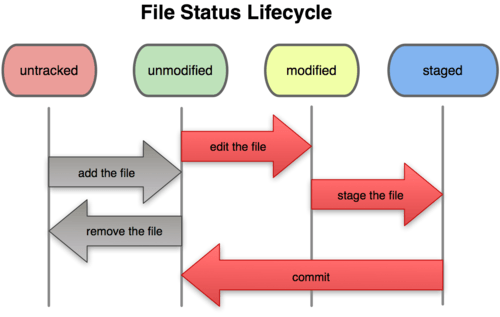
Durign this process, each file in the working directory can be in one of the two states: untracked or tracked (unmodified, modified, staged).
Checking the file status: git status
First, you need to know the status of the repository using the
git status command
git status
This means you have a clean working directory (all the files are tracked). But when you add a new file or modified an existing file, it will be untracked. For example:
touch newfile.txt       # create a new text file
gedit newfile.txt       # Open the file in gedit text editor
emacs newfile.txt       # Open the file in emacs text editor

git status
Tracking files: git add
The command git add is used to track a new file
git add newfile
git add .         # all files in the directory
git add *.txt     # all file whit .txt extension


git status
Committing Changes: git commit
Only the files that are tracked (files under git add) can be
commited using git commit
git commit
Always you need to write a commit message, a description of the main
changes. It is recommend to begin the commit message with a single short
(less than 50 character) line summarizing the changes, followed by a
blank line and then a more thorough description. -m for comment all
tracked files.
git commit -m "commit message"
The commit records the snapshot you set up in your staging area. The commit records a snapshot of the project that you can revert to or compare to later.
Check to make sure it looks like what you expected with
git show

git status
You can track and commit a file in only one step:
git commit -a -m "You don't need to perform the command add previously"
The commit history: git log
After working and creating several commits, it is possible to review the
history of our work, using the git log command
git log #showing the history of the repository
Also, we can go back to a specific commit in the past, and see our documents in the initial state
git checkout commit_id      # Go to a particular commit (only the first 5 characters of the commit _id)

gedit newfile.txt     # open the document in the initial state
cat newfile.txt
And finally, return on the latest commit
git checkout master

gedit newfile.txt     # open the document in the latest state
cat newfile.txt
Reset the repository
In git, you can reset the repository to an earlier state, respect to the
content, using the command git reset
git log  #showing the history of the repository

git reset --hard commit_id  # reset all changes after the commit

git log  # only to confirm the history of the repository
With this command you reset all changes that have happened after the commit mentioned by the commit_id. So, you reset the repository to an earlier state pemanently. (So, be careful!).
Handling files
Removing files
git rm file
Rename files
git mv file_from file_to
GitHub
GitHub is the largest code host on the planet with over 9.9 million repositories. Large or small, every repository come with the same powerful tools. These tools are open to the community for public projects and secure for private projects.
Creating an account
Access the GitHub website (https://github.com/) and get a free account just picking a username and creating a password.
Creating a repository
To put your project up on GitHub, you will need a repository for it to live in. After you signed up on GitHub, you can create your first repository, as follows:
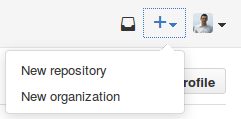
1 - In the upper-right corner of any page, click, and then click New repository.
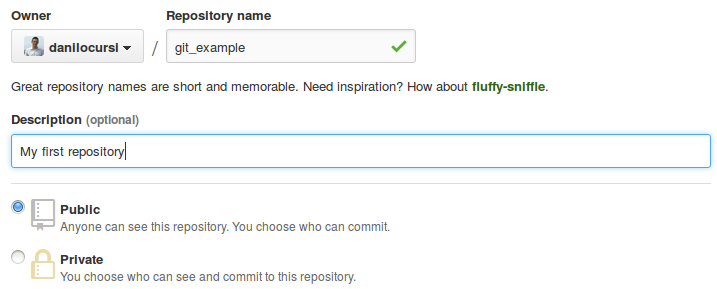
2 - Create a short, memorable name for your repository. For example, “git-example”. You can also add a description (optional) and choose if it is going to be open to the public or be a private repository.
3 - Select Initialize this repository with a README and click Create repository.
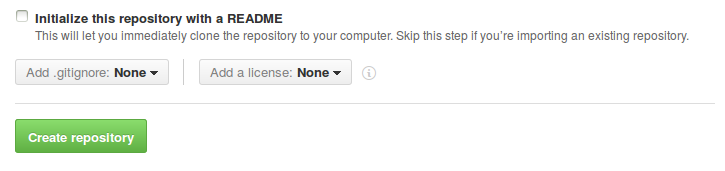
It is recommended every repository includes README, LICENSE, and .gitignore.
Clonning available project on GitHub
There are several ways to clone repositories available on GitHub. When you view a repository while signed in to your account, the sidebar shows a choice of URLs you can use to clone the project onto your computer:
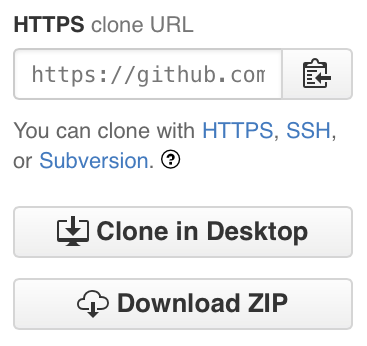
You can clone with HTTPS, SSH, or Subversion. Clonning with HTTPS is recommended because the URLs work everywhere – even if you are behind a firewall or proxy. In some cases, if you’d rather use SSH, you might be able to use SSH over the HTTPS port and generate SSH keys on each computer you use to push or pull from GitHub.
Clonning with HTTPS
git pull https://github.com/augusto-garcia/onemap.git # onemap package URL
or
git pull https://github.com/marianella-quezada/Map-Mimulus # Repository created in the last example
Pushing an existing repository from the command line
git remote add origin https://github.com/danilocursi/git_example.git
git push -u origin master
BitBucket
As well as GitHub, Bitbucket is a web-based hosting service for projects that use either the Mercurial or Git revision control systems. Bitbucket support public and private repositories. It offers free accounts with an unlimited number of private repositories (which can have up to five users in the case of free accounts). But by inviting three users to join Bitbucket, three more users can be added, for eight users in total.
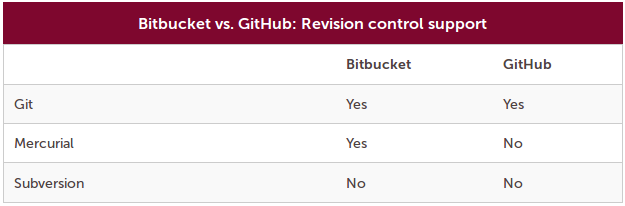
Source: Freeman, 2013.
Git Commands
- git config
- git help
- git init
- git clone
- git add
- git status
- git diff
- git commit
- git reset
- git rm
- git mv
- git clean
References
-
Chacon, Scott and Straub, Ben, 2014 (2nd Edition) Pro Git.
-
Somasundaram, Ravishankar, 2013. Git: Control Version for Everyone. Beginner’s Guide.
-
Freemann, Jonathan, 2013. at: www.inforworld.com.